Divider
The Divider Widget lets you add a line to your page to separate sections. This line helps make your website look cleaner and easier to read.
🧩 What is the Divider Widget?
The Divider Widget is used to place a simple line (either horizontal or vertical) between blocks of content. You can choose the line's size, style, color, and where it shows on your website.
🛠️ Step-by-Step Guide
Step 1: Open Layout Builder
- Go to your Joomla Administrator Panel
- Navigate to:
System→Site Template Styles→ Click on your Astroid template - Click the “Template Options” button
- Open the Layout tab
- Launch the Layout Builder
Step 2: Add the Divider Widget
- Click on the + Add Section or find the place where you want to add the divider.
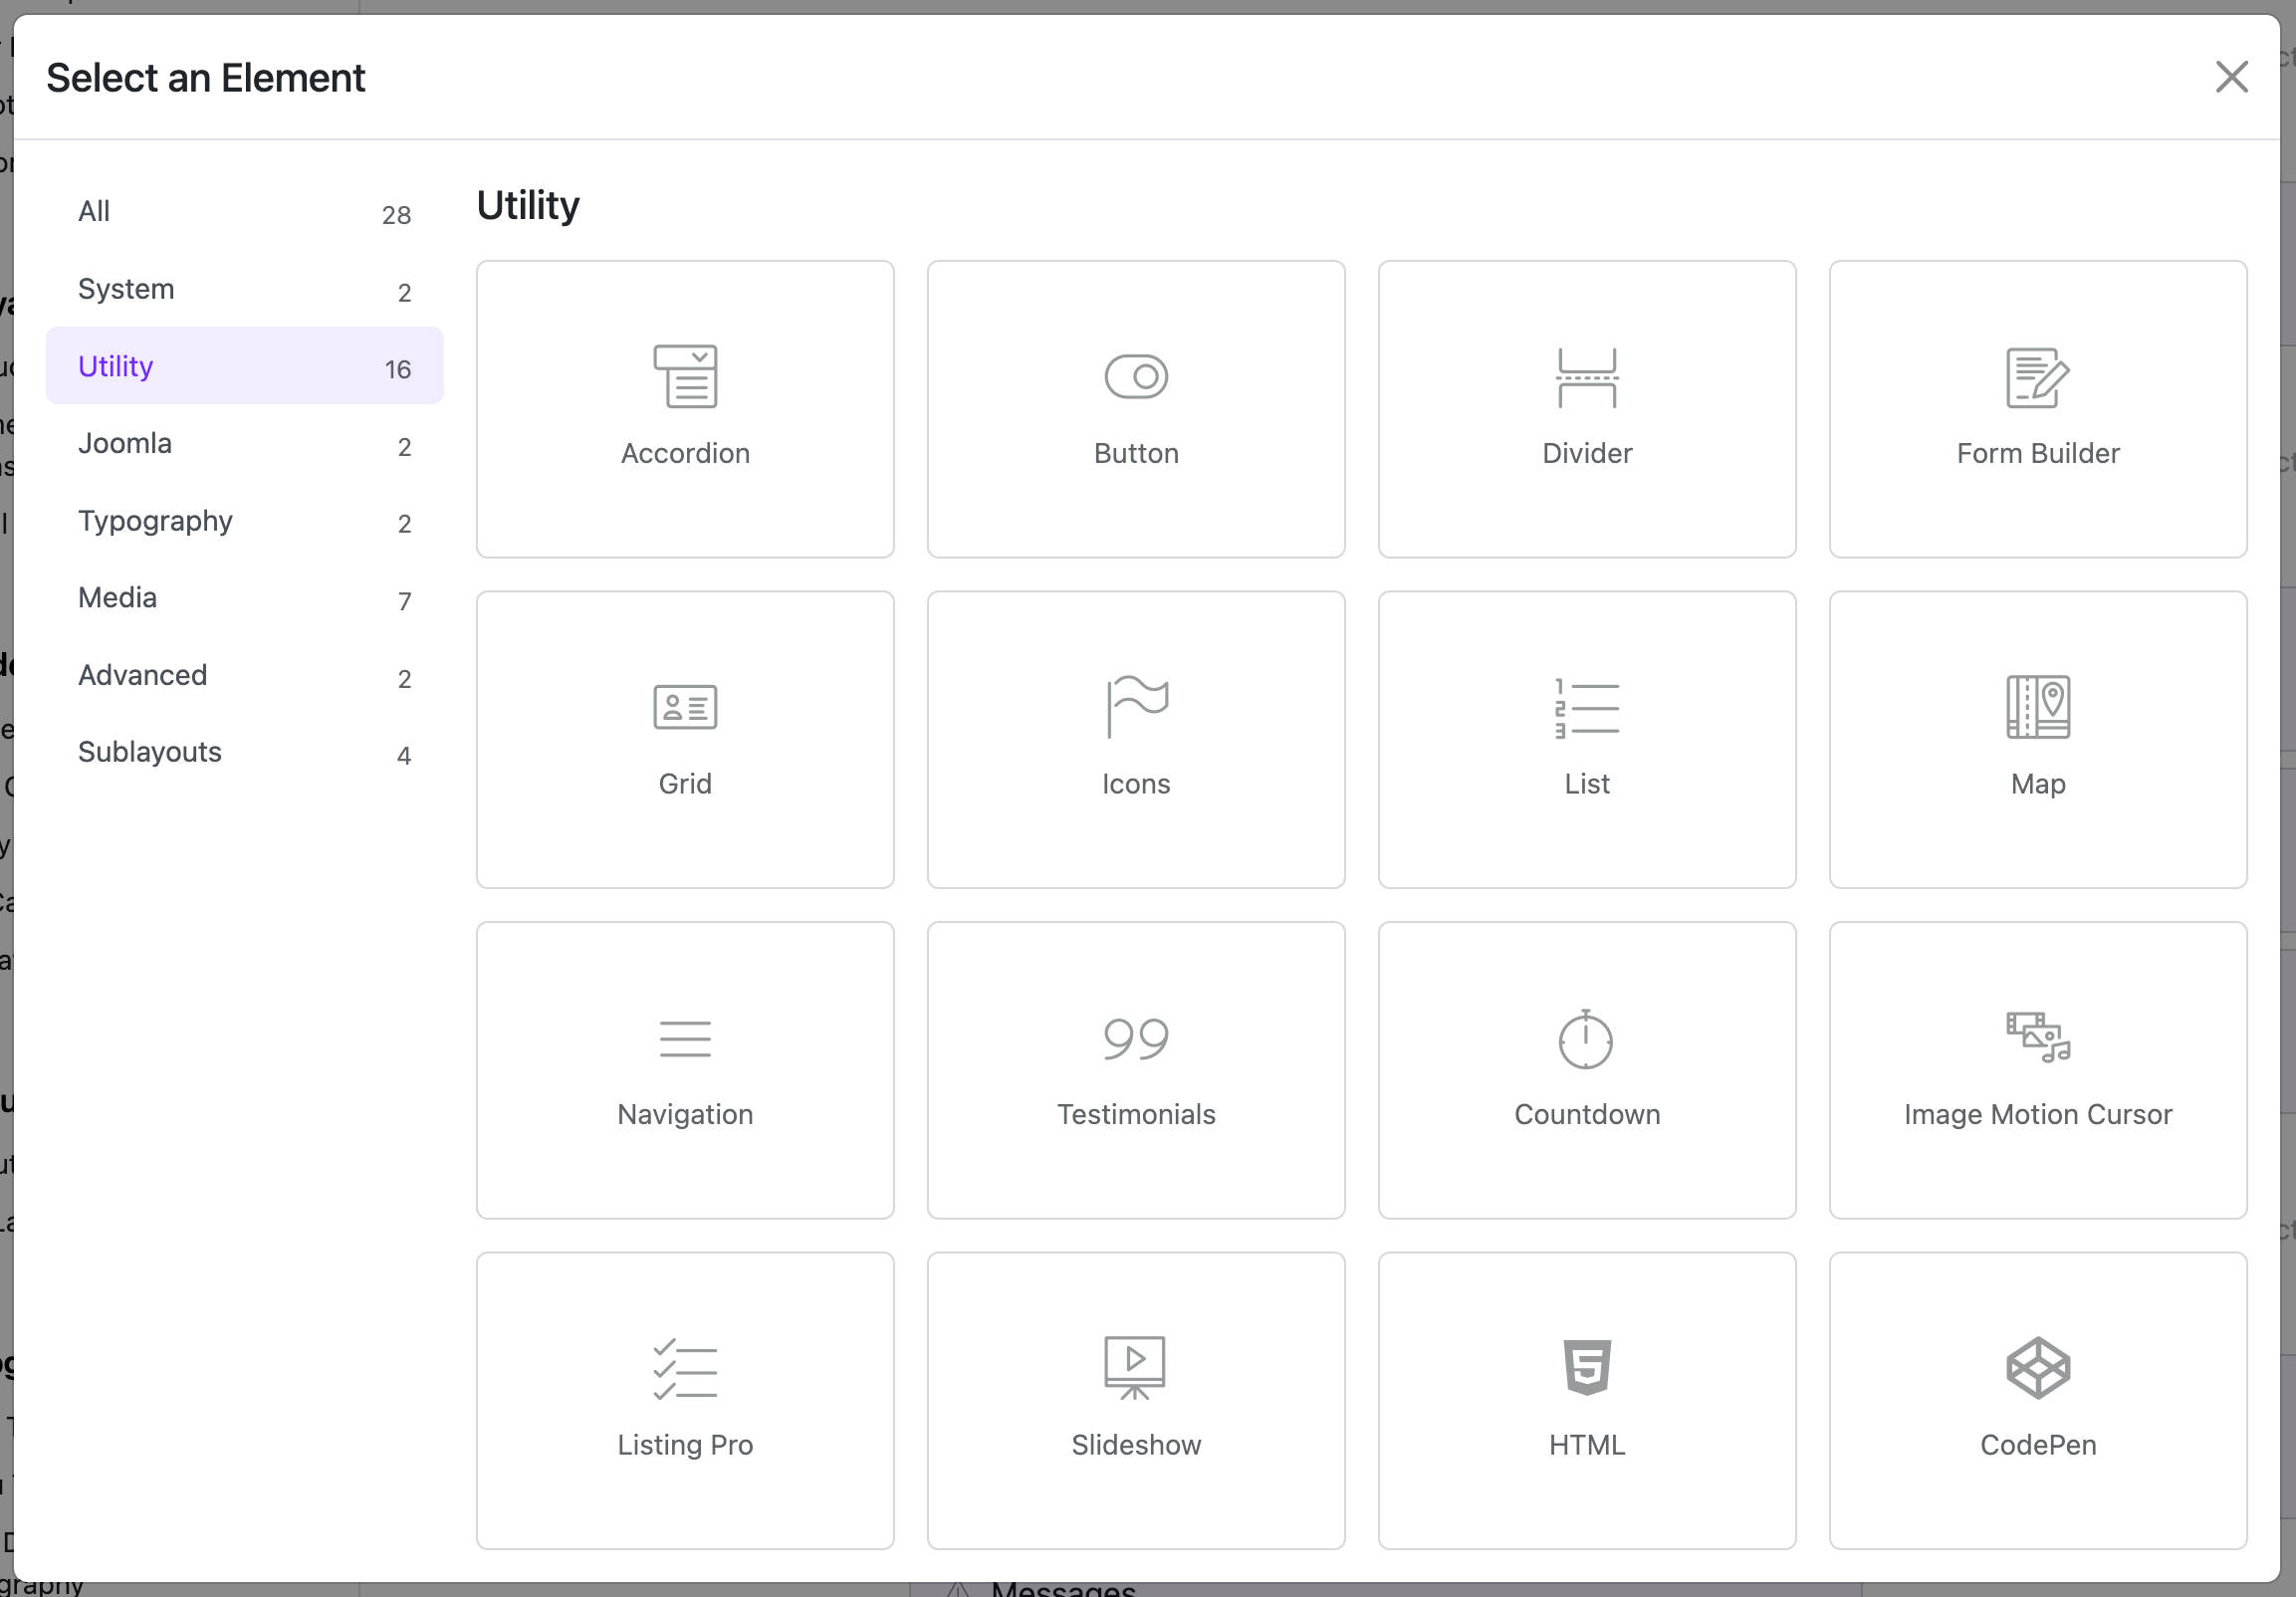
- Click + Add Element inside a section or column.
- Select Divider from the list of widgets.

⚙️ Divider Settings (Basic)
Once you add the Divider Widget, you will see some settings you can change.
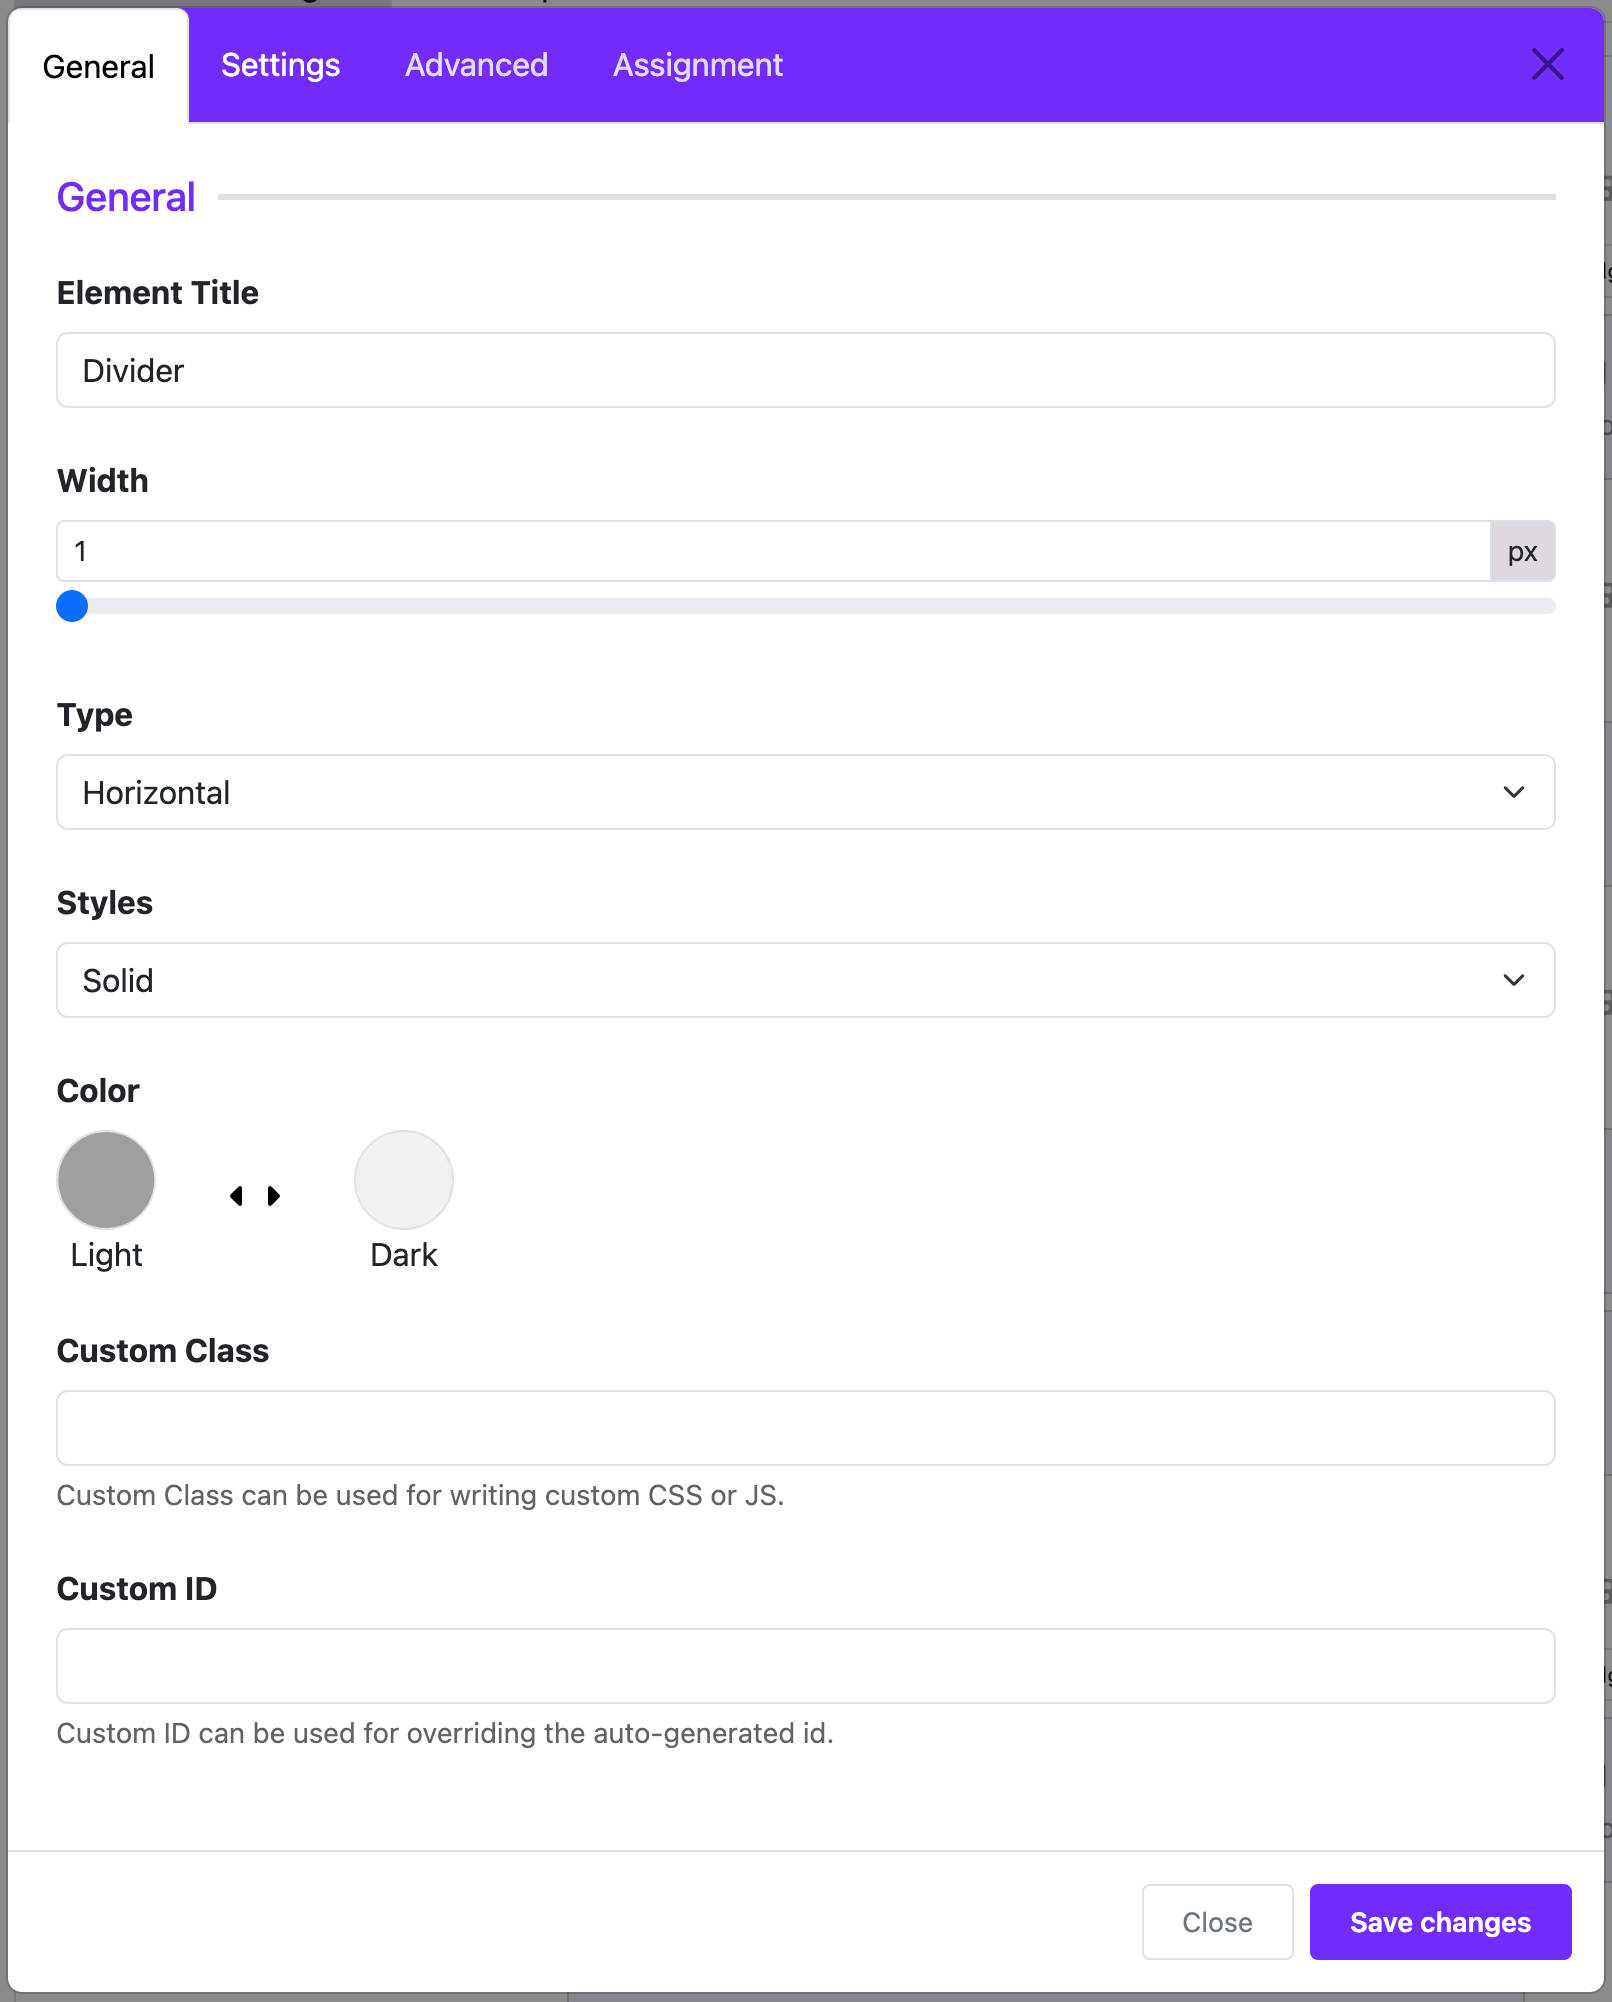
🟦 1. Border Width
- What it does: Controls how thick the line is.
- Default: 1 pixel (px)
- Tip: You can drag the slider to make it thicker.
↔️ 2. Type
- Options:
- Horizontal (line goes left to right)
- Vertical (line goes up and down)
- Tip: Use vertical only if you want to split a row into columns.
📏 3. Height (for vertical line)
- Only appears if you choose Vertical.
- What it does: Sets how tall the vertical line is.
🎨 4. Style
- Options:
- Solid (a solid line)
- Dashed (line made of dashes)
- Dotted (line made of dots)
- Choose the one that looks best for your site.
🌈 5. Color
- Click to choose the color of the line.
- You can match your site’s color theme.
📌 Where the Divider Appears
You can choose where the divider shows on your website.
🌍 Show On:
- All Pages: The divider will show on every page.
- No Pages: It won’t show at all.
- Only Selected Pages: Choose the menu items where it should appear.
📋 If you choose “Only Selected Pages”
- A new setting will appear.
- Select the menu items (like "Home" or "Contact") where you want the divider to be shown.
💡 Tips for Best Use
- Use horizontal dividers to break up large sections of content.
- Use dashed or dotted styles for a lighter feel.
- Use color to match your site's style.
- Place dividers between widgets to improve visual clarity.
✅ Finish and Save
Once you finish setting up:
- Click Save in the Layout Builder.
- Visit your site to see how the divider looks.
🎉 You’re Done!
Now you know how to add and use the Divider Widget in Astroid! It's a simple way to make your website look cleaner and more organized.