Color Mode
Color Mode Settings
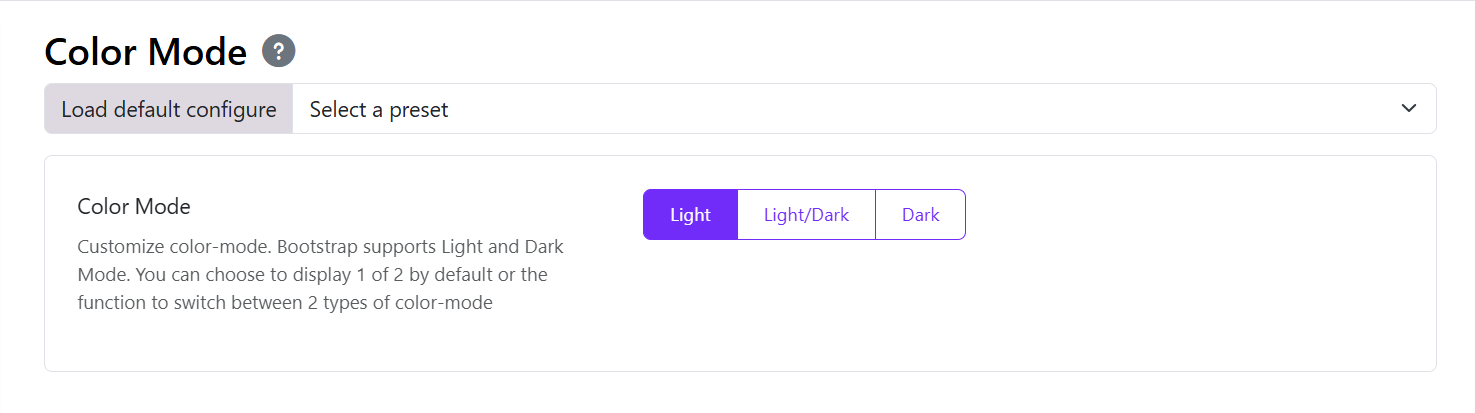
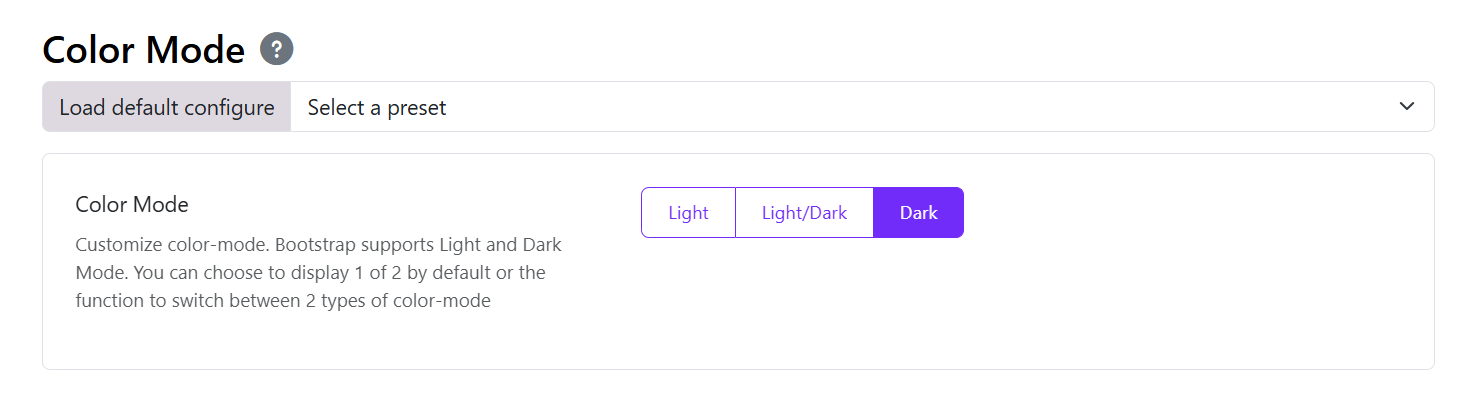
Go to Template styles > open your style > Template Options > Basic > Page Settings > Color mode You can see 3 options for Color Mode: Light, Dark vs Light & Dark.
- Light mode: Forces the entire website to use light theme only, No switching, no dark version.
- Dark mode: Forces the entire site into dark theme only.
- Light vs Dark Mode: Enables both Light and Dark modes. Users (or system) can switch between them
Light vs dark mode
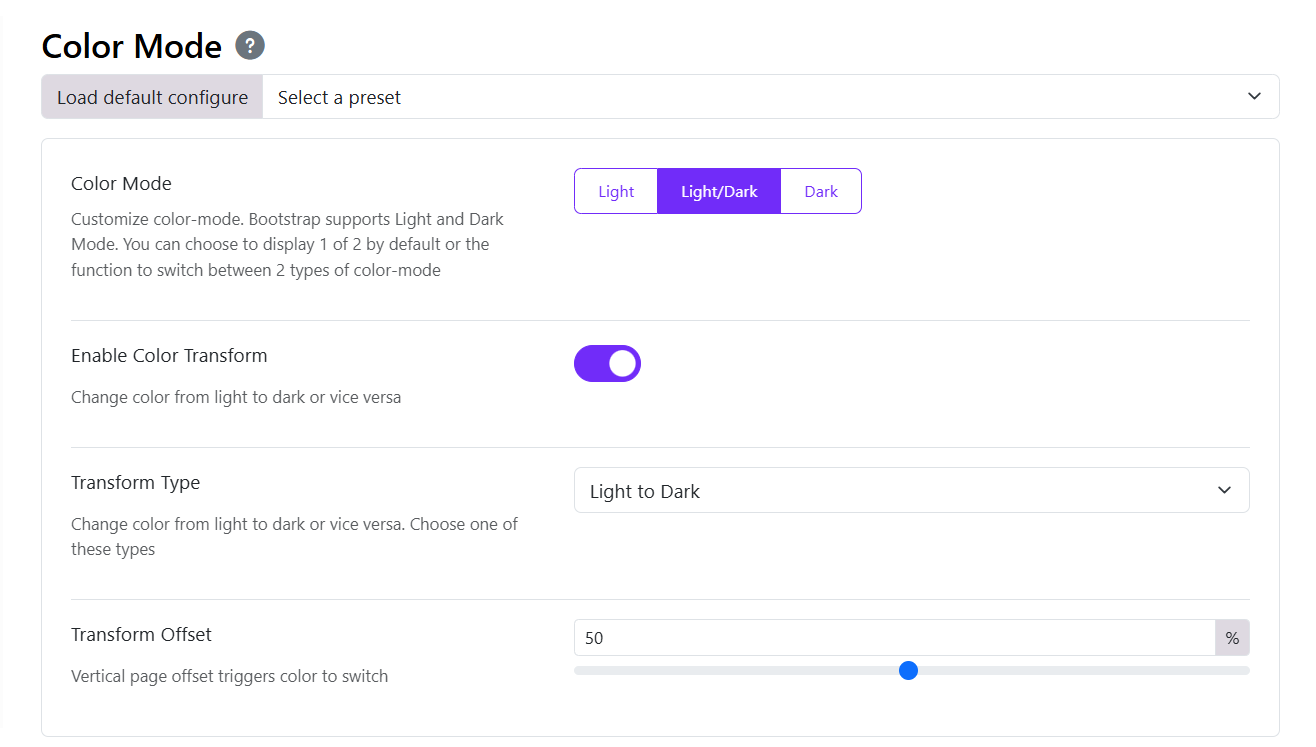
When the light vs dark mode is enabled, you will have some options below:
- Color transform: Color transform is a feature that allows you to change the color from light to dark or vice versa.
- Color mode default: Choose your color mode style (Auto, Light or Dark)
- Module position: Select a suitable module position where you want to display this feature.
- Feature Load Position: Choose After Module or Before Module. If there are other module(s) published to this module position, you can select to display the content of this feature either below or after the module(s) published to this position.
Adjust the color modes
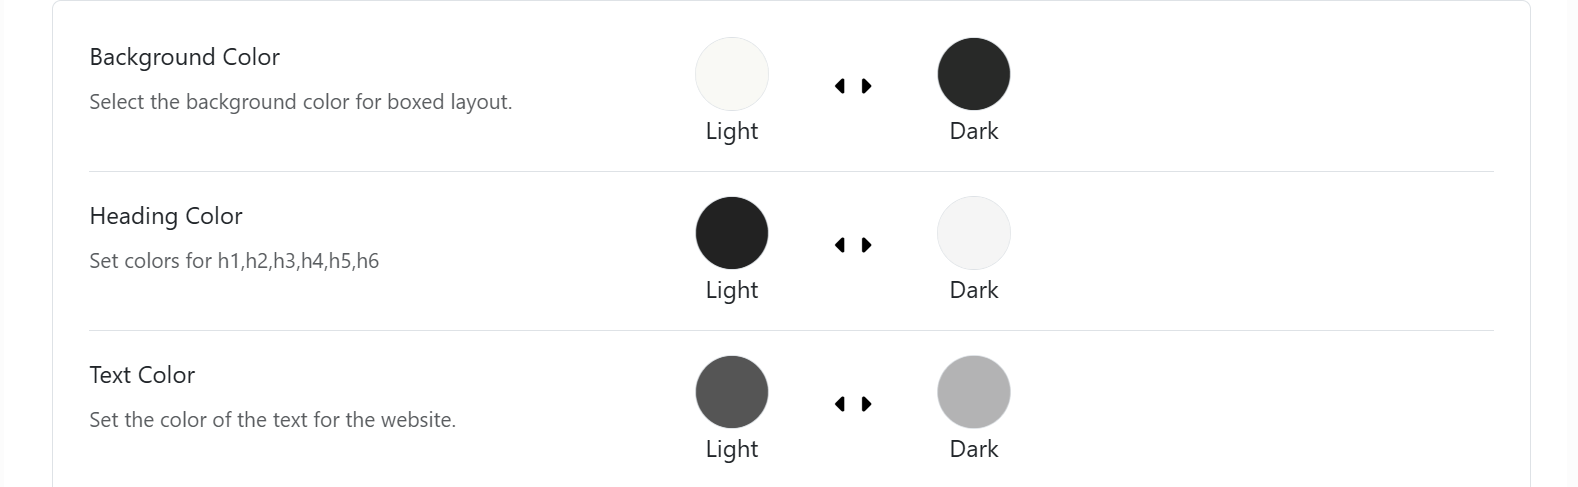
After enabling the light vs dark mode, you should go to the Color section and set up the color for the body, header, main menu, sticky menu, off-canvas menu, drop-down menu, mobile menu, and footer in both light and dark modes.
If you do not adjust the color between light and dark modes, you will not see changes when changing the color mode in the front end.