Multi-Layouts
This solution is given when we need to use multiple layout builder options for different functional pages. For example: Blog, Home Page, About Us, Contact, etc.
Previously, to do this, we had to create multiple different style templates for each specific menu. Now, Multi-layout-builder only needs one style template to do that. This helps reduce unnecessary repetitive work and optimize data.
1. Template Options
1.1. Save as Default
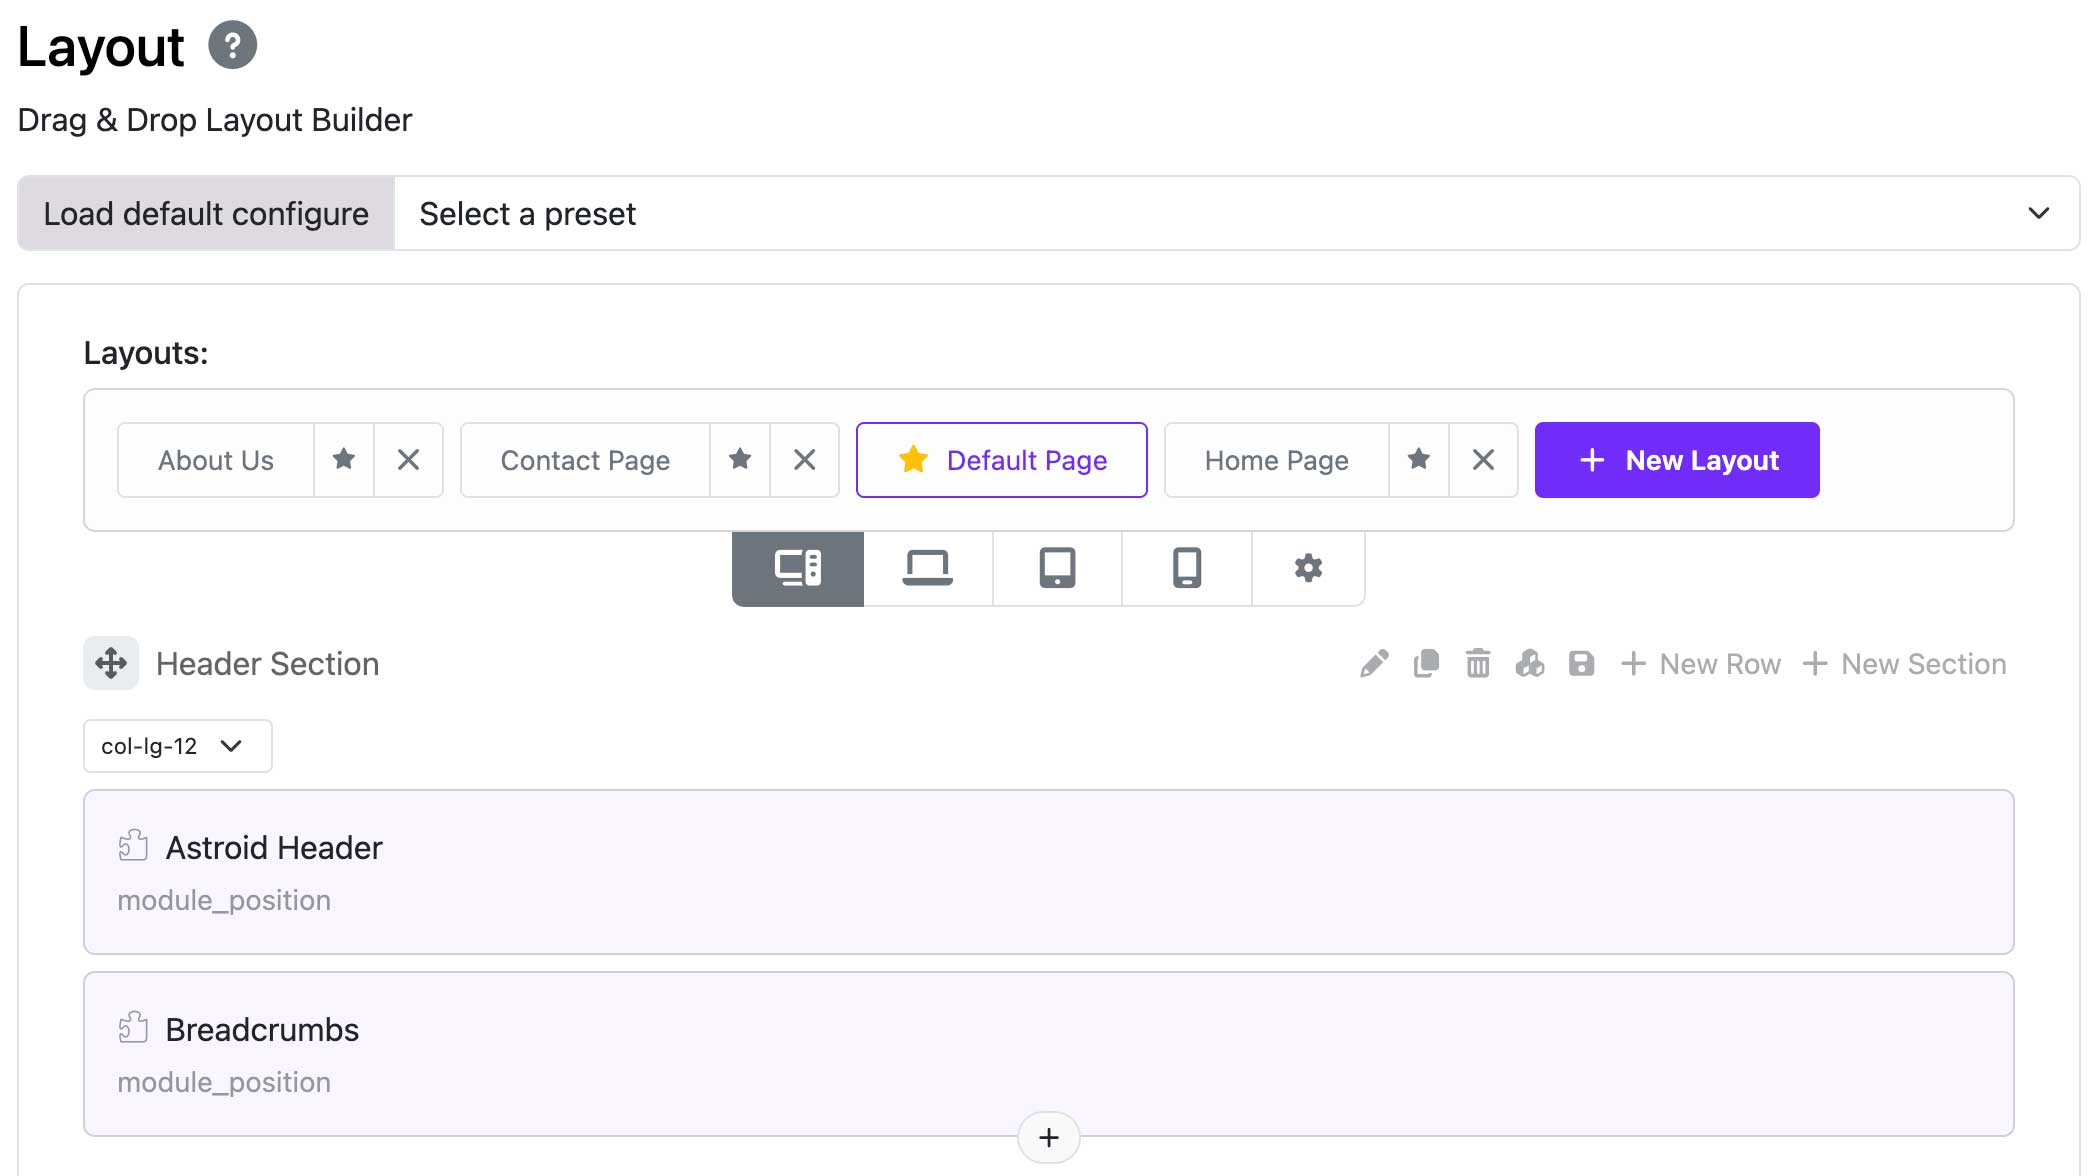
When you don't have any layout file yet. You will need to save a default layout first by clicking the "Save as Default" button, then the system will save the current layout as the default layout file of the template.

1.2. New Layout
To create a new layout, click on the "New Layout" button, then you can create a new layout. Remember to save the layout so that the system saves that layout as a new layout file for your template.

1.3. Mark as Default
To select a layout as the template's default. Select the layout and click the "Mark as Default" button or click the Star icon next to the layout's name.

1.4. Delete Layout
To delete a layout, click the Delete icon next to the layout name. Remember that you cannot delete the default layout of the template.

1.5. Edit Layout
To edit a layout, click the layout name. After editing, remember to save the layout.
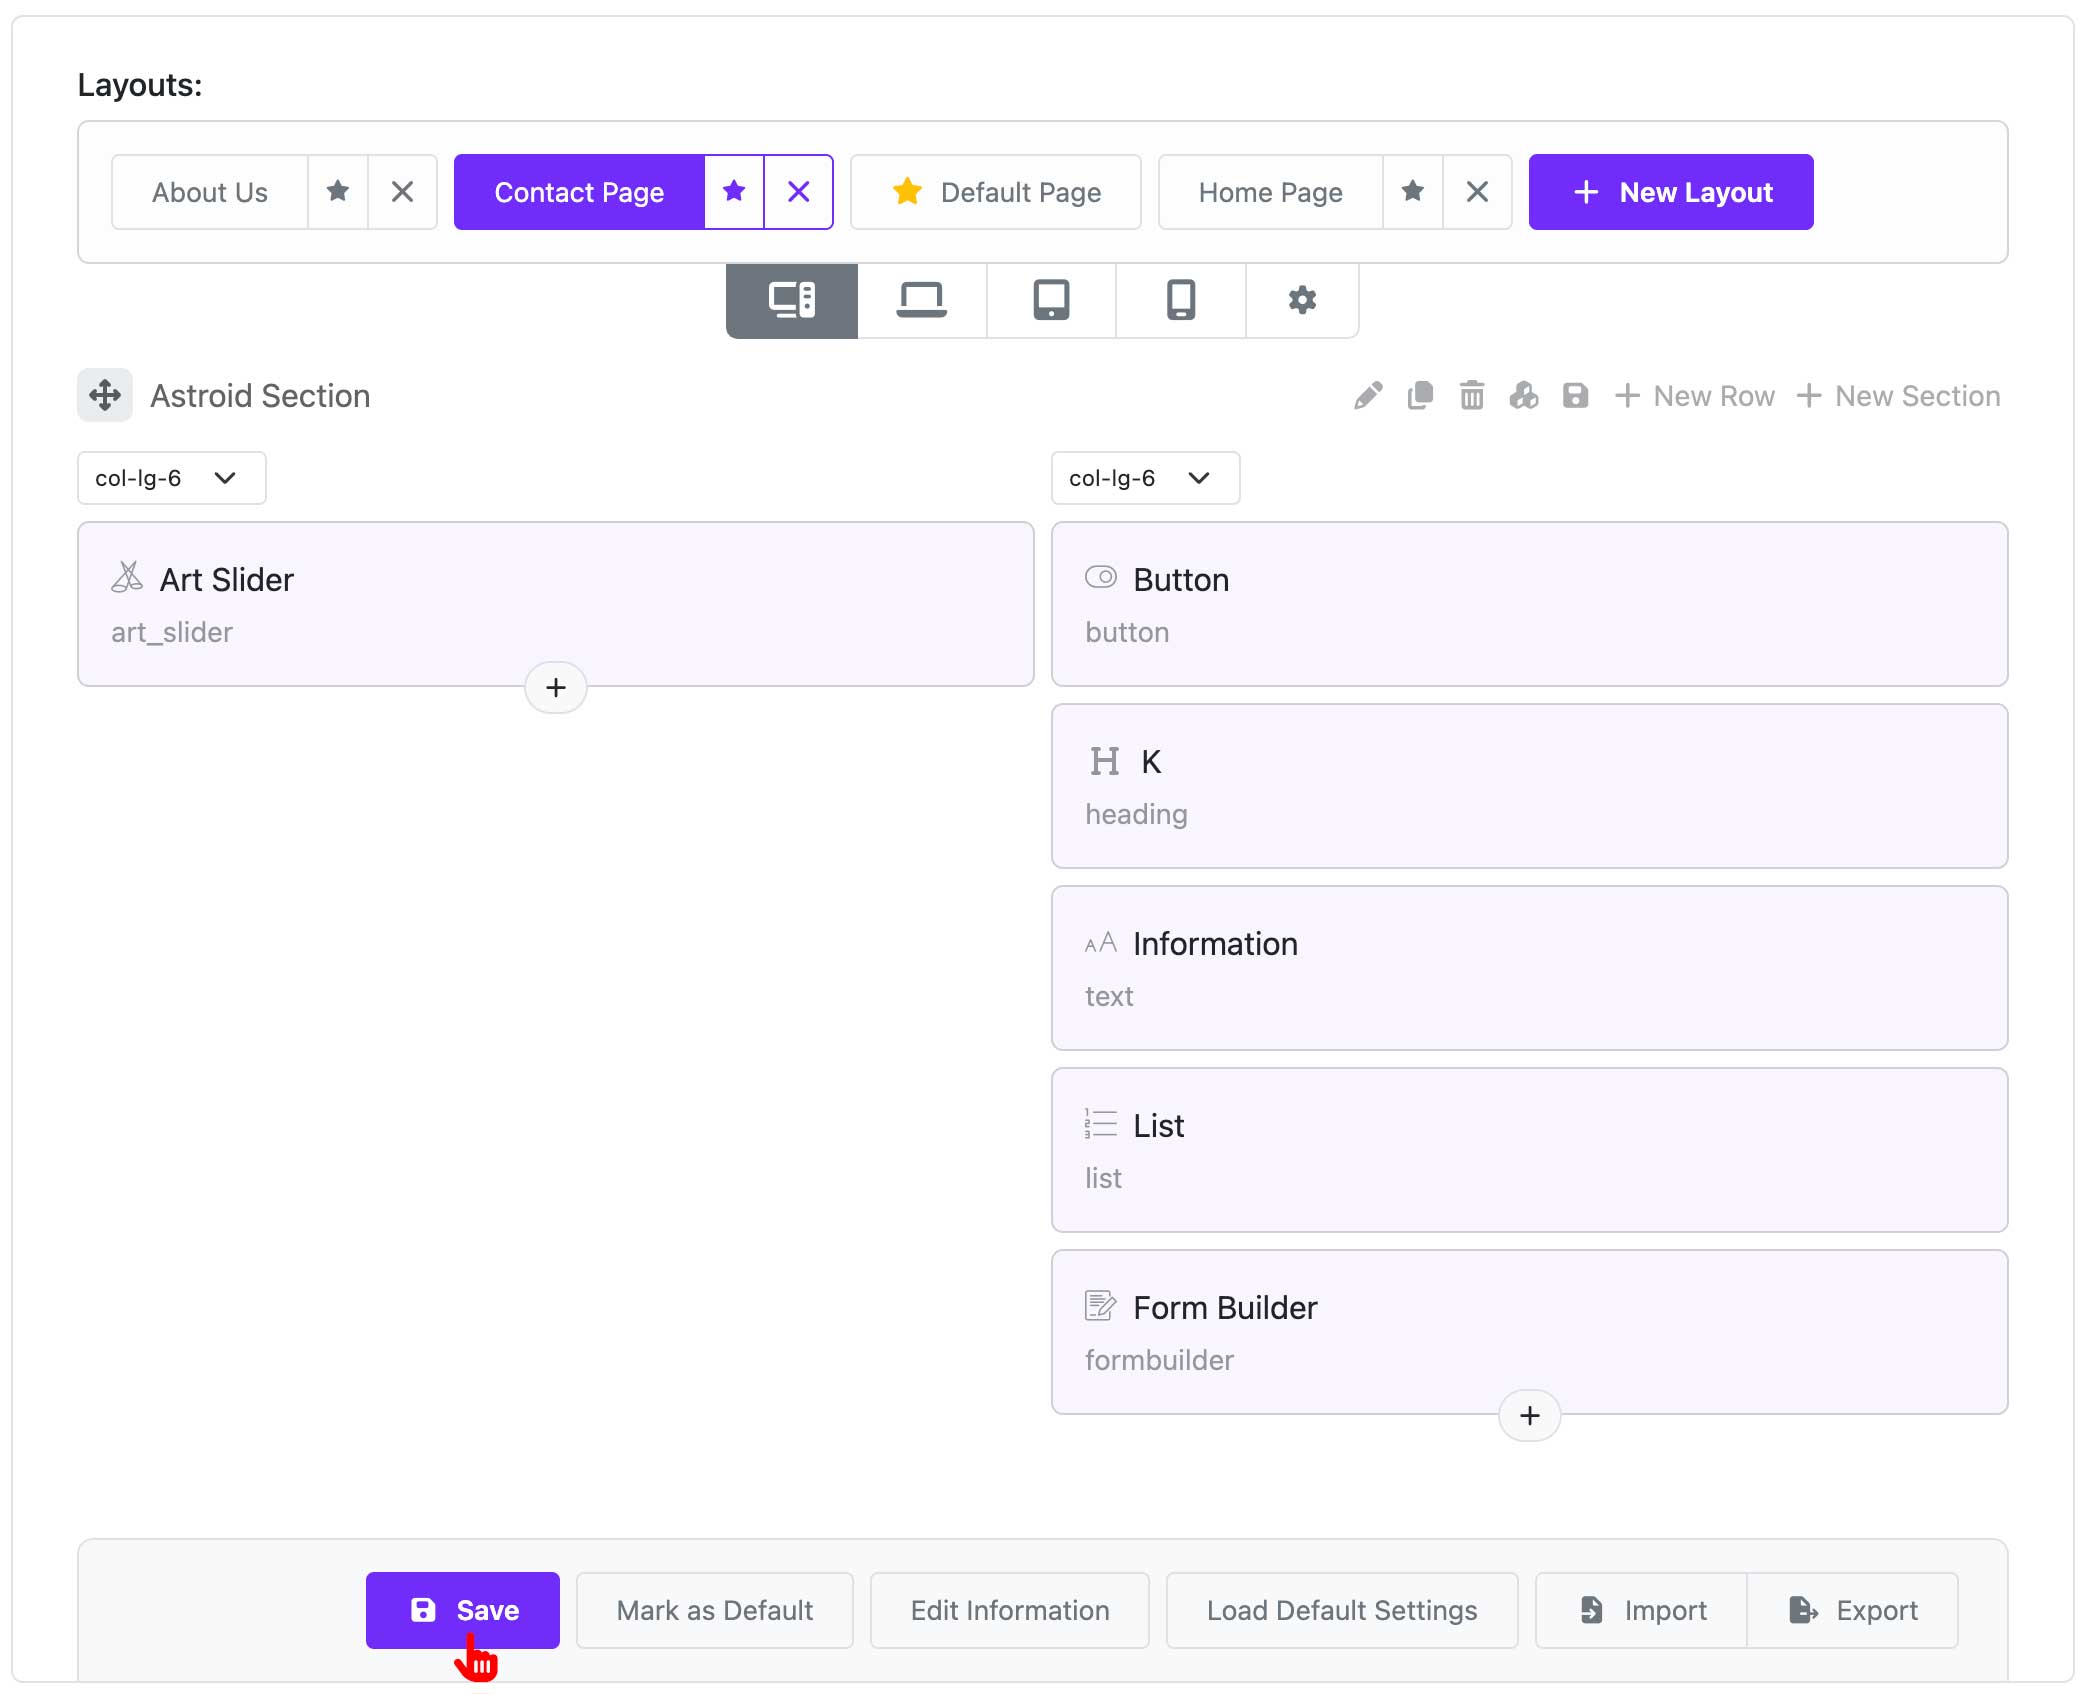
1.6. Import/Export Layout
You can export the layout file to a JSON file by clicking the "Export" button. You can also import a layout file from a JSON file by clicking the "Import" button.

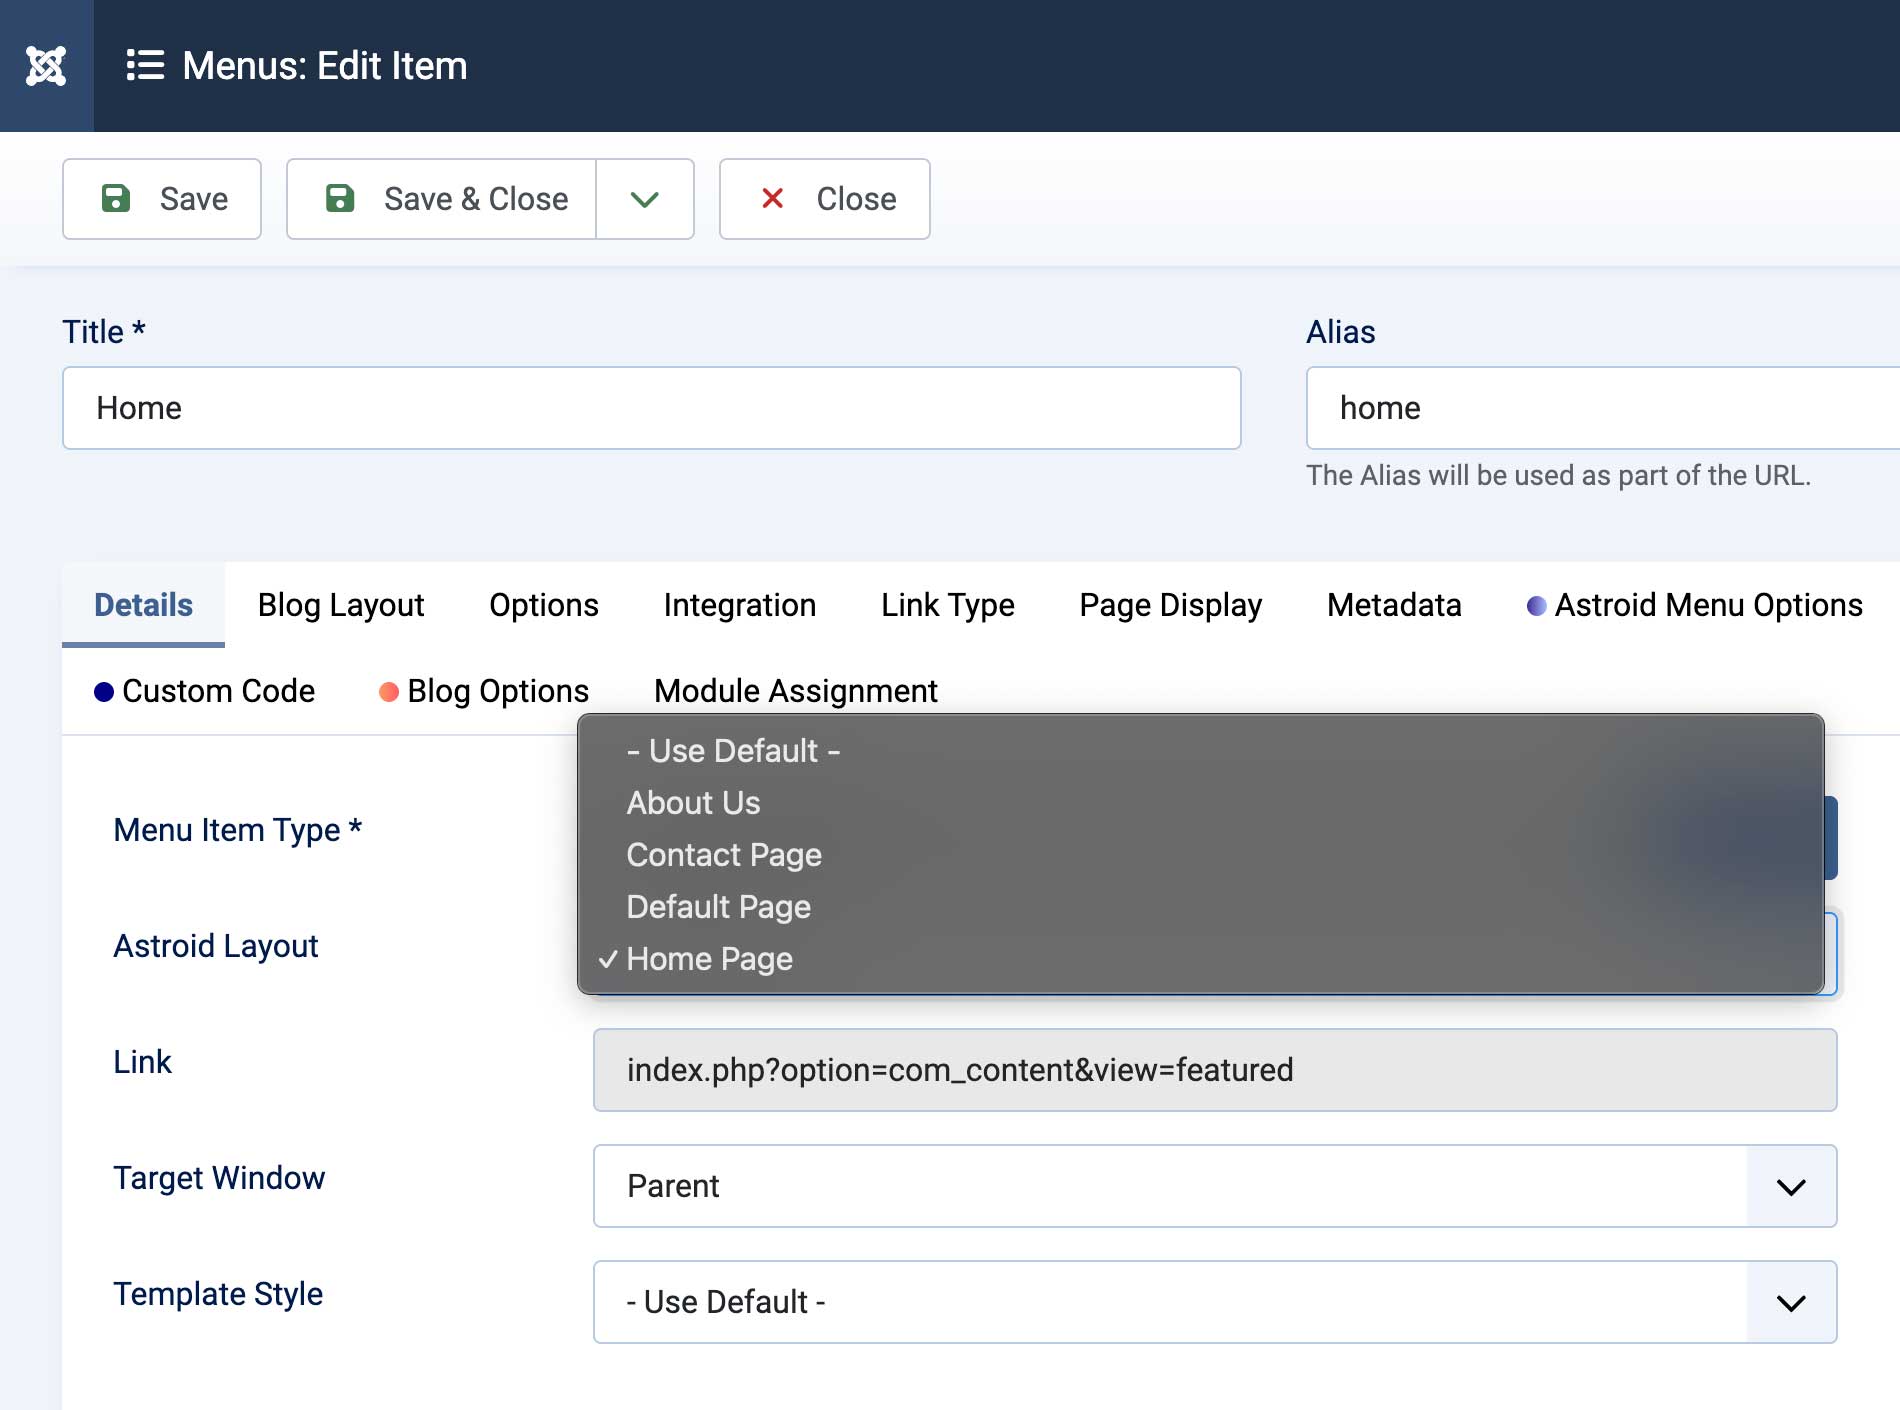
2. Menu Assignment
You can assign different layouts to different menu items. To do this, follow steps below:
- Go to Administrator → Menus → Select a menu → Edit a menu item
- In the Details tab → Find "Astroid Layout" → Select a layout you want to assign to that menu item
- Save the menu item
If you do not select any layout. The template will load the data of the default layout.